
How to change background in photoshop – gangnam style!

Continuing with the series of our photoshop tutorials for beginners, here is a simple way for you to remove an existing background in photoshop and replace it with something you like. Learning this easy skill can leads to lots of funny images. In this tutorial, we will use the most popular man in 2012, Psy of the Gangnam style fame!
Have you always wanted Psy to dance at your favourite hideout? Now, you can send him off to Mars through a surreal photo manipulation technique. Here’s what the final outcome will look like:

Step 1: Create a new 1500 X 1000 pixel Photoshop document

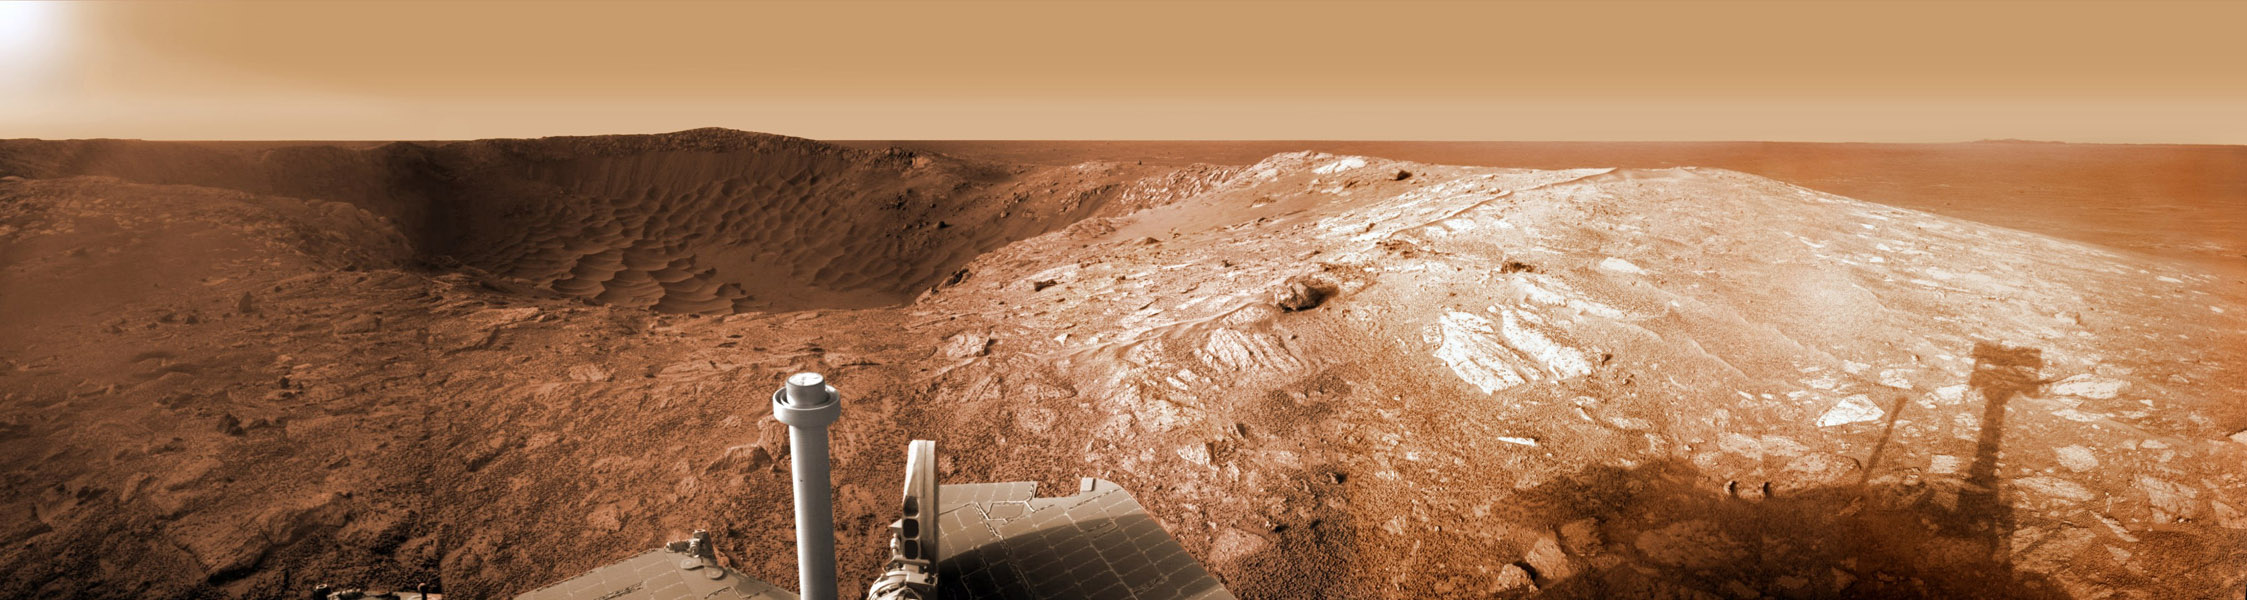
Download the image http://apod.nasa.gov/apod/image/1101/OpportunitySol2476_Kremer600hc.jpg and open it in photoshop.
Drag the image straight into the new document. Resize it so that your selected area of Martian land fits the whole document. I have chosen this piece of land:

Step 2: Drag Psy onto Mars!
Download Psy from http://1stbride.com/wp-content/uploads/2012/11/gangnam-style-boom.jpg and open the image in Photoshop. Pick up the Pen tool (P) and start to carefully draw around the edge of Psy.

After you have finished, right click and choose Make Selection.

Go to Select > Refine Edge, and use the Refine Edge tool to draw over the edge of his hair.

When you’re done, click OK.

Then, drag the selected Psy into the Mars document.

Step 3: Blend two colors in photoshop
Select the Psy layer. Let’s change the hues and colour balance so that Psy looks more like he is on Mars.
Hues / Saturation: Press Ctr + U and key in the following.

Colour Balance: Press Ctrl + B and key in the following.

Step 4: Remove light reflection in image
What’s that orange flare on his right pants? Was it from the original image? Let’s use the Clone Stamp Tool (S), get rid of it. While pressing Alt, click on the area that you want to sample. Then, let go of the Alt key and dab over the flare. It will be a copy of the area you have decided to sample. Try it.

Step 5: Remove shadow from picture
Wait, look at the image again. Isn’t something funny? It still doesn’t look real, does it? The light on Psy’s body seems to come from the right but the light on Mars comes from the left. We need some lighting correction done.
Let’s say we want the light to come from the right hand side. Let’s flip the Mars image horizontally so that the light comes from the same side.
First, use the Crop Tool (C) and crop to the document size so that the leftover from the Mars image is removed.

Then, select the Mars layer and press Ctrl + T. Right click and select Flip Horizontal. (or Edit > Transform > Flip Horizontal)

Now, the lighting is uniform! But it still doesn’t look real enough because Psy doesn’t have a shadow. Let’s make some!
Step 6: Create shadows in photoshop
Select the Psy layer and duplicate it. Rename the duplicated layer as ‘Shadow’. Select the ‘Shadow’ layer and double-click it. Check the Colour Overlay box and change the red overlay colour to black.

Put the ‘Shadow’ layer behind the Psy layer. Set the opacity of the shadow layer to 50%.

Go to Filter > Blur > Gaussian Blur.

Set the blur radius as 23.0 pixels. The shadow will become blur.

Press Ctrl + T, Right click and choose Distort. (or Edit > Transform > Distort)
Drag the edges of the shadow until it looks like Psy has cast a shadow on the surface. Make it long and slanted to the side, such that it follows the light source.

Select the ‘Shadow’ layer and click ‘Add Layer Mask’.

Select the layer mask.
Select the Gradient Took (G) by right-clicking on the Paint Bucket Tool in the toolbar.
Using the Gradient Editor, select the gradient below.

Click and drag the gradient across the shadow as seen below. This is so that the shadow appears to recede into the distance.

Edit > Transform > Warp and drag the edges of the shadow until it seems to curve over the surface.

Using the Pen Tool, let’s create some shadows underneath Psy’s feet, to make it seem like he is floating in mid-air while dancing the Gangnam Style.
Create a new layer and rename it “Feet Shadow”. Use the pen tool to draw a shadow below his feet. After finishing the path, right click and choose Make Selection.

On the “Feet Shadow” layer, fill the selection with black paint. Deselect by pressing Ctrl + D.
Change the opacity to 50%. Go to Filter > Blur > Gaussian Blur. Set the blur radius to 23.0 and there you go!

Step 7: Create explosion effect in photoshop
Gangnam Style does not play without some explosions or dust flying around. Now, let’s see how we can add some impact to Mr Psy’s dancing.
Download the dust storm image from https://blogger.googleusercontent.com/img/b/R29vZ2xl/AVvXsEhRMjQ6Eb55_hdm2O2pSuZ8P5OX9tuzGSM0VX666kqDE8HKvowjyv4mWYCqzRdnACDaerBuM3p5PbulWRVXoenHDG9IhjvwwkcHpeJUILrCI9bvQiiIagAbPwSLltgapaQ-TjInWvBfHiWV/s1600/RonMiller-MarsWeather-DustStorm.jpg and open it in Photoshop.
Use the Pen Tool (P) to select the dust smoke. Right click > Make Selection, key in 10 pixels for the feather radius. Then drag the selection to the main document.

Enlarge the smoke image and flip it horizontally, such that the light areas are facing the light source.
You can also clean up the edges of the smoke with a soft brush and adjust to a lower opacity so that the smoke looks more natural.

Step 8: Change the colour of the dust cloud to suit Mars’ surface
Hues / Saturation: Press Ctrl + U and key in the following.

Colour Balance: Press Ctrl + B and key in the following.

To make Psy stand out, you can also add Psy’s shadow on the smoke by repeating Step 6.

Step 9: Emphasize the Lighting with Lighting Effects
Select the Psy layer. Go to Filter > Render > Lighting Effects and create the following lighting.

Select the smoke layer. Go to Filter > Render > Lighting Effects and create the following lighting.

Step 10: Make it more 3D with the Burn Tool

Select the Psy layer. Use the Burn Tool to fill in the shadows on the left side of Psy’s body. This makes him more three-dimensional. You can also use the burn tool to darken the left areas of the smoke to make it seem more protruding and emerging from the left.
Here are some areas you can apply the Burn Tool on:

Finally, let’s look at the end outcome!

You can also add in dancers:

How to change background in photoshop – gangnam style!
 Reviewed by Unknown
on
9:16 AM
Rating:
Reviewed by Unknown
on
9:16 AM
Rating:
Reviewed by Unknown
on
9:16 AM
Rating:


No comments: