
photoshop tutorials free Tutorial on retro comic book effect in photoshop

Do you have a photo of your friend that you think would make people fall off their chairs laughing if you added some speech bubbles to it? Do you want to create a comic strip about your life adventures?
In this tutorial you will learn how to apply the retro comic book effect to an image. Impress your friends by giving your photos retro comic effect!
Today article is part of the photoshop tutorial for beginners series.

Right click on the image and select Copy Image. In Photoshop, press Ctrl + N (Create a new document). Click OK.
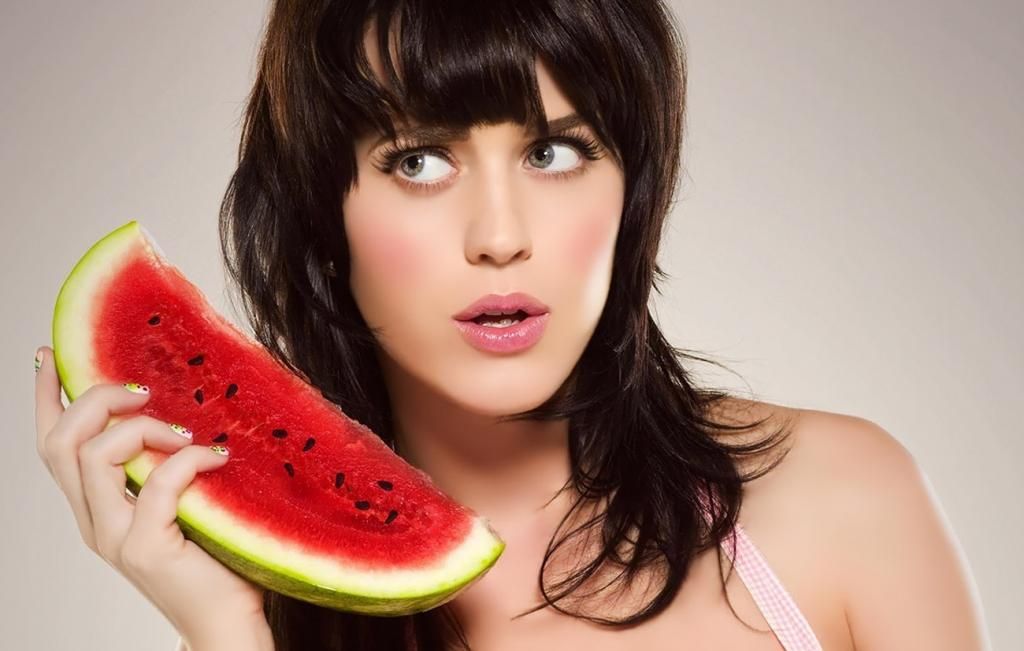
When the new document opens, press Ctrl + V to paste the copied image. The image of Katy Perry will then appear in the blank document.

Delete photo background in photoshop
Use the Pen tool (P) to select over Katy. Select inverse (Ctrl + Shift + I) and delete the background. Alternatively, you can also use the magnetic lasso tool to select the background and delete it. When you’re done, the background gradient will be gone like this:

After that, go to Image > Mode > Grayscale. Click on Don’t Flatten when the dialogue pops up.
Then, go to Image > Adjustments > Levels. Adjust to the following levels.

Convert photo to dots in photoshop
This step is to convert the photo to dots. Duplicate the image layer. Rename the duplicated layer “Dots”. Go to Filter > Pixelate > Color Halftone and key in 4 for the Max. Radius.

It will then look like this:

Coloring tutorial photoshop
Now, let’s change the image back to colour mode so that we can apply colours and make it colourful!
Go to Image > Mode > RGB Colour, and Don’t Flatten.
Now is the fun part! Colouring!
Duplicate the Dots layer. Drag the duplicated layer “Dots copy” layer to right below the Dots layer.
Selecting the Dots copy layer, go to Image > Adjustments > Levels. In the Output Levels, drag the black cursor on the left all the white to the right end like this:

Press Enter. Select the Dots layer. Change the blend mode of the Dots layer to Multiply.

Add a layer mask to the Dots copy layer by selecting the Dots copy layer and clicking the button circled in red below: Select Solid Color.

Select a skin tone colour from the pop-up window. For example, I used #ffd5c5. Then, click OK.

With the colour fill layer selected, we are now going to create a clipping mask. Hold onto the Alt key. Your cursor will become a two overlapping circles icon, and use that to click on the line between the color fill layer and the Dots copy layer. Your image will now look like this:

With the colour fill layer selected, create a new layer and rename it Colour. This will be the layer where you add colours!
While selecting the Colour layer, again, hold down the Alt Key and click on the line above the Dots Copy layer so that the paint that you will be applying will not get out of the outline.
Let’s start by colouring the eyes. Use the Pen tool to trace over the area of the eyes. Right click and select Make Selection. Paint the selected areas white.
With the Elliptical Marquee Tool (Right-click the second uppermost button in the tool box), create two circles in the eye and paint them any colour you wish. Black, brown, grey, green, pink? I used Katy’s eye colour, #727388
You can also add a sparkle to the eyes, by applying a white dot on the eyes with a soft edge brush.

Let’s do the same to the lips. I selected the lips area using the Pen tool and painted the selection with the colour #d64471.

And the teeth.

Do the same for her dress and the water melon. If you love details, you can even paint her nails and her eyelashes too! Finally, select the background layer and use the paint bucket to add colour to the background.
Make bubble speech in photoshop
Are you done colouring? You’re now ready to add in speech bubbles! Go to http://www.johancb.se/en/index.php?sida=start to download the comic font that you prefer. Install them on your computer by opening the zip folder, and clicking on the ttf. file. Then click on Install Font. You can now use the font!
Now, download the speechbubble.png at http://i170.photobucket.com/albums/u252/jcz94/Photoshop%20tutorials/bubble_zpscadbb09e.png
Right click > Copy image. Ctrl + N in Photoshop and then Ctrl + V. Select the black background with the Magic Wand tool (W) and press Backspace. Then click on the bubble and drag it into your document.
Adding Text
What is she saying? It’s up to your own imagination! To add text, press T to add a text layer over the bubble. Select the font you have installed and start typing away!
Retrofy it
When you’re done, it’s time to add a grainy effect to make it look more retro!
Go to Filter > Artistic > Film Grain and adjust to the following levels:

This is what my final image looked like!

photoshop tutorials free Tutorial on retro comic book effect in photoshop
 Reviewed by Unknown
on
9:17 AM
Rating:
Reviewed by Unknown
on
9:17 AM
Rating:
Reviewed by Unknown
on
9:17 AM
Rating:


No comments: